Do you frequently switch between the many camera modes without really knowing which one to use? It's very common knowledge among photographers, with "don't use automatic" or "use manual" being the only two pieces of straightforward guidance available. To be honest, I don't see much value in that suggestion. After all, it's not the most efficient way to just plunge someone into the thick of the manual. Check out our extensive list of Wedding Photographers in Melbourne to help capture your special moments.
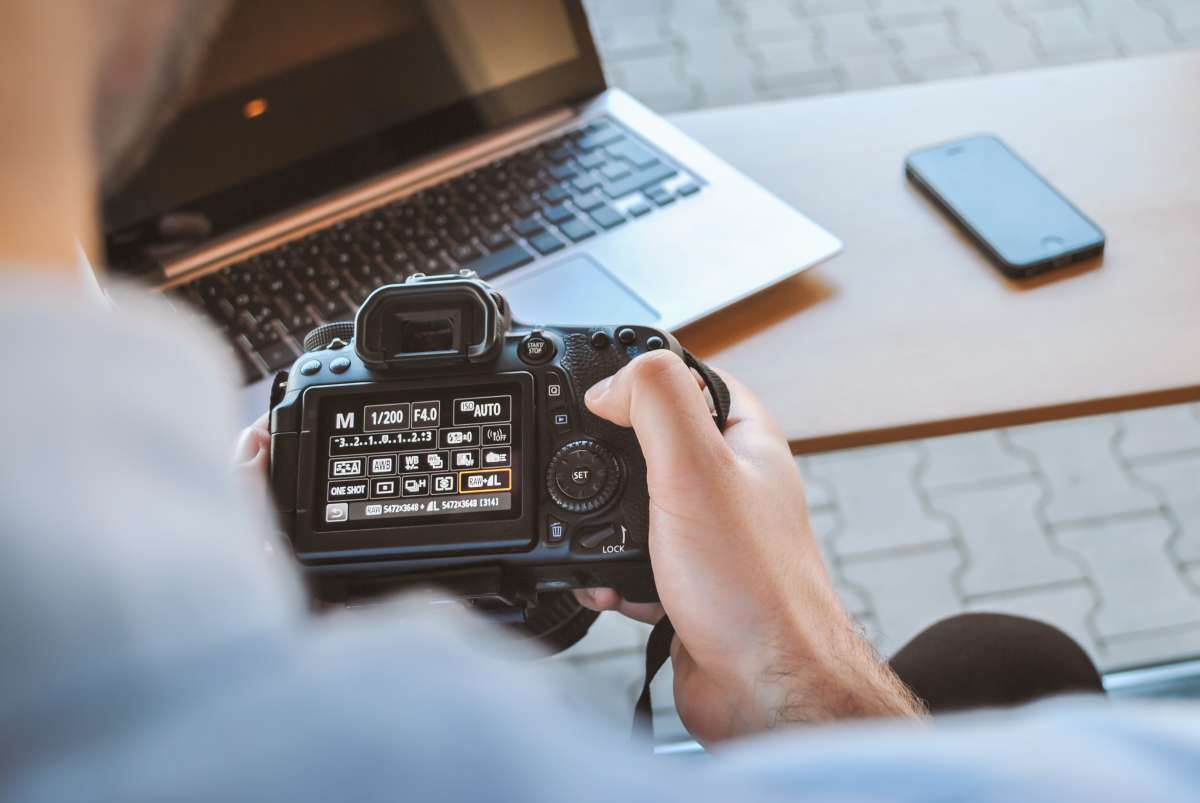
Any digital camera worth its price will include multiple shooting modes. These modes allow you to select the best shutter speed and aperture for the shot you wish to take, as determined by the camera's settings. They are useful for both amateur and professional photographers who need to snap a quick shot. Get used to these controls and learn how to navigate with ease.
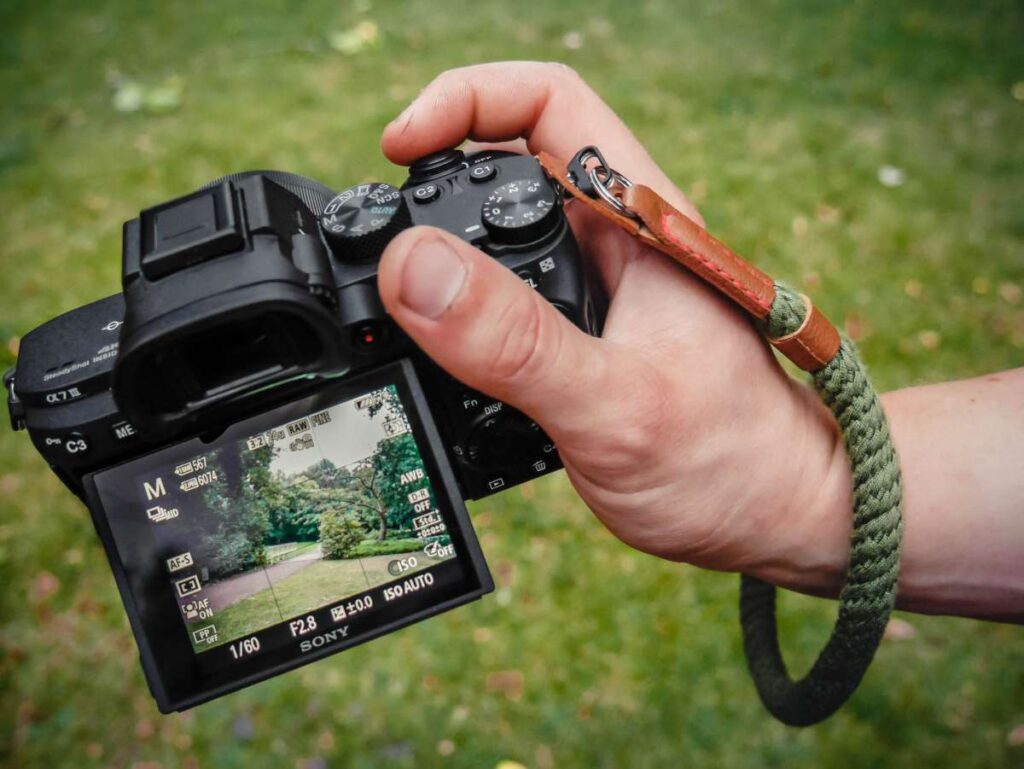
Learn Photography Shooting Modes.
First things first: a primer on shooting modes. Simply said, these are the settings on your camera that govern how much control you have over the various aspects of exposure and how much the camera takes over for you.
Due to a lack of functionality, early cameras do not have shooting modes. They are completely hands-on. Due to advances in technology, modern cameras are capable of making all of their own settings decisions. The shooting modes of the camera give the photographer options for how to deal with this.
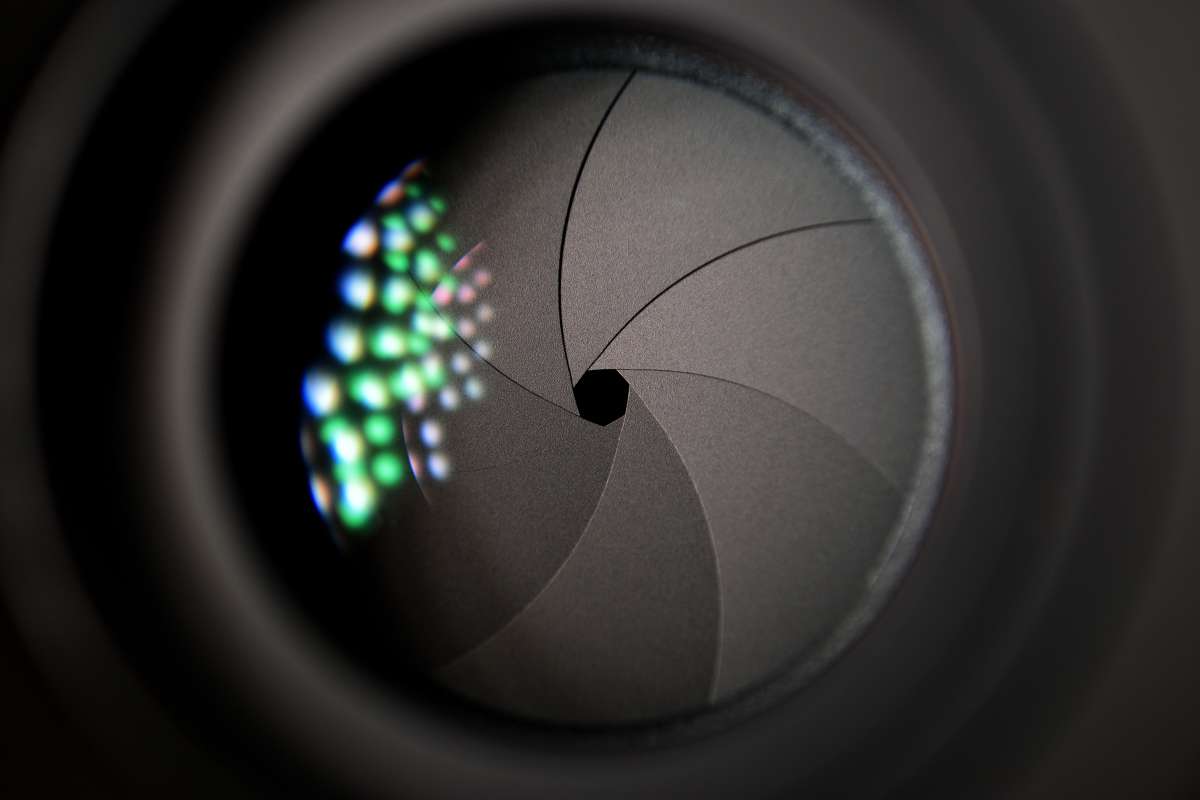
The first thing I want to say is that you should read my post on learning photography if you don't know anything about the elements of exposure. It will serve as a solid groundwork for your future photography and directing endeavours. Aperture, shutter speed, and ISO are the three controls that make up a photograph.
It is your responsibility as a photographer to master manual mode and master these three controls. Sometimes, though, you may wish to narrow your focus to just one or two areas. You can let the camera take care of some of these situations if you like.
What Are The Photographic Camera Shooting Modes?
Many different options exist for taking photographs, but here we'll cover the fundamentals. To name a few:
- Manual Mode
- Program Mode
- Aperture Priority Mode
- Shutter Priority Mode
All other photographic shooting modes are automatic ones, in which the camera decides how everything should be set.
You can change the ISO, metering mode, and other settings in programme mode because it is a hybrid shooting mode. Since shooting in programme mode gives the camera full control over the exposure, I recommend you stay away from it.
Since you have little say over the camera's settings, it's advisable to avoid the automatic modes altogether. All judgments are being made by the camera automatically. Don't use them, especially while you're still getting to know your camera's various shooting modes.
Photographic Shooting Modes: Manual Mode
Shooting in manual mode is regarded as the pinnacle of photography by many enthusiasts. That you're not a real photographer if you can't use manual mode is the opinion of some people.
Nonsense.
Don't let anyone pressure you into shooting in manual mode; the camera's manual mode is just another tool in your photographic toolbox. Like They indicated up top, they have been a professional photographer for almost fifteen years, and I almost always use aperture priority mode.
The f-stop (aperture), shutter speed, and ISO are all under your control when shooting in manual mode. Most digital cameras now come with auto ISO, so if you want to shoot properly manually, you'll need to disable auto ISO.
Advantages Of Manual Mode Shooting
- Making deliberate exposure decisions with each photograph will help you master the topic.
- Learning how to use your camera, its controls, and its exposure is like second nature.
- No camera settings or preferences will influence your exposure decisions in any way.
- In making exposure decisions for each photograph, your knowledge of exposure will grow.
The First Advantage Of Shooting In Manual Mode Is That You Can Master Exposure Much Faster.
Digital cameras have the advantage of rapid feedback, so when you make a mistake you can either learn from it or keep trying until you get it right. Doing so will help you quickly grasp the nuances of your camera's exposure settings. This method of shooting is great for practising, but it should never be used when working for a paying customer.
Your Camera's Settings, As Well As Exposure, Will Become Second Nature To You.
For the same reasons given above, learning to shoot in manual mode will make adjusting the camera's exposure settings feel natural. Therefore, you will correct the issue if you accidentally use a different camera shooting mode.
No Input From The Camera Is Required When Choosing An Exposure Setting.
Similarly, the camera decides on exposure for you in all the other modes. To be fair, it makes assumptions based on algorithms developed by the camera's manufacturer, so it isn't infallible. The possibility of it being incorrect is high. By switching to manual mode, you eliminate the need to rely on the judgement of a camera company's in-house engineer and instead take full control of the camera's settings.
Negative Effects of Manual Mode Photography
- If you're shooting in manual mode, it's easy to focus too much on the equipment and not enough on the subject.
- Over time, you develop a 'chimping' habit. Chimping is when you check your screen after each and every shot.
- Due to the need for continual exposure adjustments, your productivity will suffer.
When Shooting In Manual, It's Easy To Focus Too Much On The Equipment And Too Little On The Subject.
From this point of view, the best photos are captured during moments of mutual understanding and appreciation between the photographer and the subject of the photo. Shooting in manual mode can occasionally disrupt this link. If you're a photographer, you need to make sure your client is relaxed and natural in front of the camera, and that won't happen if you're preoccupied with the technical details of taking the shot. If you can avoid working in manual mode, you'll have more time to spend building rapport with your customer and, ultimately, producing higher-quality photographs.
The More You Do It, the More Habitual Chimping Becomes. "chimping" means checking your screen after each and every shot.
Don't keep staring at the monitor after each picture. This method of shooting completely severes the rapport that is so vitally crucial between the customer and the photographer. To a large extent, manual mode shooting necessitates checking the camera's display after each shot.
A light metre can be used to adjust the camera's exposure settings before snapping the photo. During the heydey of film, this is how things were done.
You Can't Work As Quickly Since You Have To Constantly Adjust The Exposure Settings.
You can't shoot as quickly if you change the exposure settings after every picture. Of course, that will reduce your speed. Manual shooting will slow you down at first, but as you get better, it will slow you down less and less.
When Should Manual Mode Be Used?
It would be a mistake to assume that you'll never need to shoot in manual mode. Indeed, you must! Perhaps, employ it only when absolutely required.
- When using strobes or other manually manipulated light sources, select the Manual shooting option. Plugging in manual mode will be helpful if you are using strobes or off-camera flashes. Knowing that the aperture (f-stop) regulates the brightness of your strobes while the shutter speed affects the brightness of the ambient light is key when shooting with strobes in manual mode.
- Shoot in manual mode if the illumination is stable and uniform everywhere you go. Shooting in manual mode may be the best option if you're in a well-lit environment with consistent illumination. Manual mode allows me to keep the exposure exactly where I want it, which is very useful when photographing under controlled lighting conditions, such as a wedding event.
- In challenging lighting conditions, the manual approach is the best bet. In difficult lighting conditions, where the camera's built-in light metre is easily tricked, switching to manual mode is the best option. When attempting to capture sun flare in my photographs, We often run into this issue. Because the camera's light metre never gets the exposure right when we are trying to capture sun flare, We need to go to manual mode.
Modes Of Photography Shooting That Prioritise Aperture Or Shutter Speed
The only reason We have grouped these together is because their benefits and drawbacks are identical. In the following sections, we explain why you need to use the Nikon and Canon shooting modes for different purposes.
To have the camera choose the shutter speed for you, shoot in aperture priority mode. It is also necessary to manually set the ISO if the camera is not in auto ISO mode.
Selecting A or Av on the mode dial will put you into aperture priority mode. Photographers that care primarily about the depth of field in their photos, such as portrait and nature photographers, should shoot in aperture priority mode.
The shutter speed is set manually, while the camera determines the f-stop automatically in shutter priority mode. The ISO must be manually adjusted if the camera is not set to automatic mode. Choose the S or Tv on the camera mode dial to go to shutter priority. The shutter speed analogy is perfect, as tv stands for temporal value.
Photographers, such as sports and action photographers, who want to emphasise motion or movement in their pictures should use the shutter priority shooting option.
The Advantages Of Shooting In Aperture And Shutter Priority Modes
- Makes it possible to focus less on the camera and more on the work and the client.
- You can get more done without stopping to check the exposure of each shot.
- Aperture and shutter priority options reduce the need to "chimp."
Focus More On Your Customers And Less On Your Camera With Aperture And Shutter Priority Modes.
Since there are fewer variables to adjust, you'll have more mental bandwidth to devote to each individual customer. Aperture and shutter priority modes allow you to set the aperture and shutter speed, respectively, and let the camera take care of the rest. Don't forget to use auto ISO, which will remove the need to manually adjust the ISO.
You Can Work Quickly Because You Won't Need To Check The Exposure After Every Shot With Your Camera.
You can get a lot more done in less time if you focus on just one aspect of exposure. If you're having trouble getting the shot you want, just change the f-stop or the shutter speed and keep shooting. Adjust the f-stop and ignore the shutter speed until it's going too slow when shooting in aperture priority mode.
Reduced "Chimp" Occurrences Due To Focused, Single-Setting Modifications.
Many photographers have the unfortunate habit of chimping. Shooting in aperture or shutter priority mode reduces the frequency with which you need to review the photograph. You may trust your camera settings more and pay more attention to the customer if you shoot in this manner.
Cons Of Using Aperture Priority Mode When Shooting
- Part of your exposure will be decided by the camera you use.
- If you aren't responsible for your own orientation, you might not learn as rapidly.
- Exposure compensation is a skill you must acquire.
Some Of The Exposure Controls Are Made By Your Camera.
The ability to fine-tune your camera's exposure settings is an essential skill for any photographer. You may feel overwhelmed if you let the camera decide on all of the exposure settings. When using the camera's aperture or shutter priority modes, those controls will be overridden.
Not Setting The Exposures Yourself Could Slow Your Progress In This Area.
Mastering exposure is essential in photography, and it can be difficult to tell what works without a little practice if your camera is doing some of the work for you. The simplest method to manage this situation is to shoot in manual mode until you master the settings.
You Should Figure Out How To Use Exposure Compensation.
Your exposures may be off if you shoot in aperture or shutter priority modes because the camera is making some of the
settings. The only solution is to use exposure compensation. If you're interested in reading about on exposure compensation, click the link.
How To Use Aperture Priority Mode?
If you want to take better portraits of individuals, We suggest switching to aperture priority mode. When taking portraits, depth of field is your top priority. Twenty individuals will require a different depth of field than two, thus you'll need to change the f-stop accordingly.
Setting your f-stop is also essential for achieving the desired depth of focus and separation between your subject and background.
Is There A Time When You Should Use Shutter Priority Mode?
When photographing subjects with motion, We advise using the shutter priority shooting mode. In the case of a waterfall, you can achieve a glassy effect by blurring the water, while in the case of sports, you can freeze the motion.
In photography, the shutter priority mode is used whenever there is motion.
Is Aperture Priority Used By Professionals?
The short answer is yes; they are able to. Most professional photographers employ aperture priority because of the advantages it provides.
Aperture priority mode is favoured by portrait and wedding photographers because it makes adjusting the aperture the focal point of the camera.
When hired to film somewhere new, most pros will immediately assess the lighting conditions. No matter what aperture they select, the ISO is set high enough to provide a quick enough shutter time for sharp photos. That gives users with the option of making a snap decision about the aperture setting to use for the lens in order to get the desired effect in their photo. Looking for the best Wedding Photographer in Melbourne? Check out our ultimate list here.
Semi-Auto Modes
The word "auto" in the name of these modes gives the impression that they are completely hands-off. This is a common misconception that We try to dispel whenever possible, since semi-auto modes are among the most useful tools at a photographer's disposal. As a result, you may focus more on the composition and other essential creative aspects of a photograph rather than worrying about whether or not the exposure is correct, thanks to the camera's technology.
Semi-automatic shooting modes are widely used by professionals in the field of nature photography. You can still shoot fully in manual mode even when you aren't in a 100% manual mode. It simply eliminates the need to fiddle with the dials every time the lighting changes. The lighting conditions are unpredictable while shooting wildlife or landscapes in the wild. If you have to fiddle with the exposure settings every time the lighting changes, you can miss some great shots.
This is very useful when photographing a subject against a white background. Because cameras tend to metre for snow, you may discover that your problem is underexposed. In order to properly expose your subject, you can brighten the photograph by selecting a positive exposure compensation.
Aperture Priority Mode
When we photographing wildlife, aperture priority is the shooting setting We always use. Depending on the brand of camera you have, it may be labelled as "A" or "Av." The lens's aperture is under your command while using the aperture priority mode. To put it another way, if you choose an aperture of f/5.6, it will remain that way until you manually adjust it. If the exposure of your shot is off, the camera can change the shutter speed automatically. This is achieved by adjusting the camera's light metre, the specifics of which are explained in this article.
Shooting in aperture priority mode is a great way to adapt to sudden shifts in light, making it ideal for capturing wildlife in their natural habitat.
Unless you have auto ISO selected, you will also be able to adjust this setting. An increased ISO setting makes the camera's sensor more sensitive to light. By increasing the ISO, the camera can use a faster shutter speed while still maintaining an adequate exposure. We suggest reading up on the exposure triangle if that doesn't make sense.
The reason you would want to use aperture priority setting is... Aperture control, for one thing. The beautiful bokeh effect sought after by so many wildlife photographers is impossible to accomplish with an artificially selected narrow gap (high f-stop setting). Moreover, there is no hard and fast rule for how fast or slow the shutter can fire, so you can always get a properly exposed photo. Simply increasing the ISO will give the balancing shutter speed some breathing room if it's getting too sluggish and maybe creating camera wobble.
Priority Shutter Mode
Shutter priority setting, sometimes known as S or Tv, is one that We never use. This mode, like the more common "aperture priority," will lock your shutter speed at the specified value. The aperture value is then used to achieve exposure parity.
The issue is that there is a limit on how wide your aperture can be set. It's tempting to use a quick shutter speed to avoid blur, but doing so can lead to underexposure if the camera isn't able to let enough light in via the lens' aperture. You can try increasing the ISO, however the photos you took before will be underexposed. Furthermore, there is a limit to how high the ISO may be set before adding significant amounts of digital noise.
Eventually, even the f/1.8 lenses will run into this issue. So, in conclusion, We would advise you to refrain from using the shutter priority mode.
ISO Auto-Tuning Manually Operated
For photographers, this is another another popular choice. It combines the advantages of full manual control with those of aperture priority and shutter priority. The ISO is then used by the camera to achieve proper exposure.
Simply set your camera to manual mode, which is usually labelled "M" on your camera's mode dial. Make sure your ISO is set to auto after that. To do this, simply navigate to the ISO setting in your camera's menu. Some cameras allow you to speed up the process by holding down the ISO button and rotating another dial.
Can you explain the drawback? When the ISO is set to auto, it has the potential to rise to unacceptable levels, producing unwanted noise. You can control how high the ISO goes, but eventually you'll run into issues with underexposed photos. If that's the case, though, maybe we should just stop firing!
The ability to eliminate motion blur while still retaining a soft bokeh makes this configuration a popular choice among wildlife photographers. We have considered it in the past and can see why some could find it appealing. The preference for aperture priority over this is purely habitual. Aperture priority is what We recommend if you, like me, are concerned about not being able to manually adjust the ISO.
Full Manual
This setting is more familiar to you as a landscape photographer. You may adjust the aperture, shutter speed, and ISO independently. Since there is nothing in this setting that the camera can adjust, exposure correction is unavailable.
You should definitely read the handbook cover to cover, but (at least in the case of wildlife photography) there aren't that many times when you'll actually need to apply the information in there. There are a lot of steps involved that are usually unnecessary when adjusting the lighting. In doing so, you risk missing shots or ruining your composition. This is food for thought!
When you're in a pinch and don't have time to fiddle with the settings, or if you just don't know what they are, this feature can come in handy. The photo is properly exposed because the day is bright, but auto-exposure sometimes struggle in dim lighting and often uses the flash when it isn't required.
Other Camera Modes
Portrait Mode
To emphasise the human subject while keeping the background out of focus, portrait mode "assumes" that one is in the foreground of the frame.
The camera will automatically use a fill-in flash if it detects low light. In sunny weather, when the sun throws a strong shadow, a fill-in flash might be helpful as well. To get the most out of portrait mode, try to shoot outdoors when there is enough of light.
Sports Mode
Due to the rapid nature of sports, the sports mode will provide a fast shutter speed of between 1/500 and 1/1000 of a second.
Using a fast shutter speed to freeze action eliminates the need for the flash, albeit this is only effective when the sun is out. The combination of the sports mode and the continuous shooting mode, in which pictures are taken one after another, can produce a large number of photographs that are perfect for capturing movement.
Macro Mode
When capturing pictures of subjects smaller than your hand, you'll want to use the macro setting.
Don't expect truly macro results when photographing in macro mode; that requires a macro lens. When photographing in macro mode, it's best to utilise a small aperture and lots of light. Therefore, if the illumination is bad, you should use a tripod. You'll need to pay closer attention to focus if you want a sharp macro image. There is less space for error when working with a shallow depth of field.
Landscape Mode
When shooting in landscape mode, the aperture is typically kept narrow (a high f/number) so that the entire frame, from the foreground to the background, is in sharp focus. With a wide-angle lens and adequate lighting, landscape mode may produce stunning results. It will automatically utilise flash if it detects a dark foreground, however you can disable this feature.
The Mode For Taking Pictures At Night
When shooting in night portrait shots, the camera will automatically adjust the brightness of the foreground to maintain a good contrast with the dark background.
To let in enough light to catch the background while keeping the subject in focus, the aperture will need to be fairly wide; yet, flash will be required to illuminate the figure and prevent blur. In the night portrait mode, the flash may fire twice, giving the subject an unsettling double exposure effect.
High-Tech Shooting Settings
Most digital single-lens reflex cameras additionally have the letter modes M (Manual), AV (Aperture-Priority), TV or S (Shutter-Priority), and P. (Programmed Auto).
When shooting in manual mode, the photographer is responsible for adjusting every aspect of the image.
- The photographer can specify the aperture value in Aperture-Priority mode, and the camera will determine the appropriate shutter speed.
- TV allows the photographer to select the shutter speed first (useful while shooting sports, for example), with the corresponding aperture being adjusted automatically by the camera.
- While the camera chooses the shutter speed and aperture in P-Program mode, the photographer has full control over the camera's exposure controls.
Conclusion
Learn Photography Shooting Modes. These are the settings on your camera that govern how much control you have over the elements of exposure. Aperture, shutter speed, and ISO are the three controls that make up a photograph. Modern digital cameras are capable of making all of their own settings decisions. Shooting in programme mode gives the camera full control over the exposure.
Since you have little say over the camera's settings, it's advisable to avoid the automatic modes altogether. Most digital cameras now come with auto ISO, so if you want to shoot manually, you'll need to disable auto ISO. When shooting in manual mode, it's easy to focus too much on the equipment and not enough on the subject. Over time, you develop a 'chimping' habit where you constantly check your screen after each picture. You can't shoot as quickly if you change the exposure settings after every picture.
Selecting A or Av on the mode dial will put you into aperture priority mode. The shutter speed is set manually, while the camera determines the f-stop automatically. Manual mode allows me to keep the exposure exactly where I want it, which is very useful when photographing under controlled lighting conditions. Aperture and shutter priority modes allow you to set the aperture and shutter speed, respectively, and let the camera take care of the rest. Auto ISO will remove the need to manually adjust the ISO.
Sports and action photographers who want to emphasise motion in their pictures should use shutter priority mode. Aperture priority mode is favoured by portrait and wedding photographers because it makes adjusting the aperture the focal point of the camera. When taking portraits, depth of field is your top priority and you'll need to change the f-stop accordingly. Exposure compensation is also essential for achieving the desired depth of focus. Semi-automatic shooting modes are widely used by professionals in the field of nature photography.
You can still shoot fully in manual mode even when you aren't in a 100% manual mode. If the exposure of your shot is off, the camera can change the shutter speed automatically. Priority Shutter Mode is one that We never use. This mode, like the more common "aperture priority," will lock your shutter speed at the specified value. There is no hard and fast rule for how fast or slow the shutter can fire, so you can always get a properly exposed photo.
Full Manual mode allows you to adjust the aperture, shutter speed and ISO independently. Portrait mode assumes that the human subject is in the foreground of the frame. Sports mode will provide a fast shutter speed of between 1/500 and 1/1000 of a second. When shooting in landscape mode, the aperture is typically kept narrow so that the entire frame, from the foreground to the background, is in sharp focus. When photographing in macro mode, it's best to utilise a small aperture and lots of light. It will automatically utilise flash if it detects a dark foreground, however you can disable this feature.
The shooting mode of a camera is crucial to understanding what aspects of exposure control the photographer has and what the camera handles.
Don't be timid as you go out and shoot; try everything! The more you use them, the more you'll understand which settings are ideal for a certain shot. It's no secret that I have a soft spot for aperture priority mode. However, perhaps you have a different taste. Here at Boutique Events Group, we have compiled an exclusive list of Melbourne Wedding Photographers to help capture your special day
To some, using default settings is a sign of inexperience, yet there are times when we are in a pinch and can't take the time to fine-tune things to our liking.
Content Summary:
- These modes allow you to select the best shutter speed and aperture for the shot you wish to take, as determined by the camera's settings.
- Get used to these controls and learn how to navigate with ease.
- First things first: a primer on shooting modes.
- Simply said, these are the settings on your camera that govern how much control you have over the various aspects of exposure and how much the camera takes over for you.
- The shooting modes of the camera give the photographer options for how to deal with this.
- It is your responsibility as a photographer to master manual mode and master these three controls.
- You can change the ISO, metering mode, and other settings in programme mode because it is a hybrid shooting mode.
- Since shooting in programme mode gives the camera full control over the exposure, I recommend you stay away from it.
- Since you have little say over the camera's settings, it's advisable to avoid the automatic modes altogether.
- Don't use them, especially while you're still getting to know your camera's various shooting modes.
- Don't let anyone pressure you into shooting in manual mode; the camera's manual mode is just another tool in your photographic toolbox.
- The f-stop (aperture), shutter speed, and ISO are all under your control when shooting in manual mode.
- Learning how to use your camera, its controls, and its exposure is like second nature.
- In making exposure decisions for each photograph, your knowledge of exposure will grow.
- Doing so will help you quickly grasp the nuances of your camera's exposure settings.
- Similarly, the camera decides on exposure for you in all the other modes.
- By switching to manual mode, you eliminate the need to rely on the judgement of a camera company's in-house engineer and instead take full control of the camera's settings.
- If you're shooting in manual mode, it's easy to focus too much on the equipment and not enough on the subject.
- Chimping is when you check your screen after each and every shot.
- Shooting in manual mode can occasionally disrupt this link.
- If you can avoid working in manual mode, you'll have more time to spend building rapport with your customer and, ultimately, producing higher-quality photographs.
- To a large extent, manual mode shooting necessitates checking the camera's display after each shot.
- A light metre can be used to adjust the camera's exposure settings before snapping the photo.
- It would be a mistake to assume that you'll never need to shoot in manual mode.
- When using strobes or other manually manipulated light sources, select the Manual shooting option.
- Knowing that the aperture (f-stop) regulates the brightness of your strobes while the shutter speed affects the brightness of the ambient light is key when shooting with strobes in manual mode.
- Shoot in manual mode if the illumination is stable and uniform everywhere you go.
- Shooting in manual mode may be the best option if you're in a well-lit environment with consistent illumination.
- In difficult lighting conditions, where the camera's built-in light metre is easily tricked, switching to manual mode is the best option.
- Because the camera's light metre never gets the exposure right when we are trying to capture sun flare, We need to go to manual mode.
- In the following sections, we explain why you need to use the Nikon and Canon shooting modes for different purposes.
- To have the camera choose the shutter speed for you, shoot in aperture priority mode.
- Makes it possible to focus less on the camera and more on the work and the client.
- Aperture and shutter priority options reduce the need to "chimp."
- Adjust the f-stop and ignore the shutter speed until it's going too slow when shooting in aperture priority mode.
- Shooting in aperture or shutter priority mode reduces the frequency with which you need to review the photograph.
- Part of your exposure will be decided by the camera you use.
- The ability to fine-tune your camera's exposure settings is an essential skill for any photographer.
- The simplest method to manage this situation is to shoot in manual mode until you master the settings.
- Your exposures may be off if you shoot in aperture or shutter priority modes because the camera is making some of the settings.
- The only solution is to use exposure compensation.
- If you want to take better portraits of individuals, We suggest switching to aperture priority mode.
- When photographing subjects with motion, We advise using the shutter priority shooting mode.
- In photography, the shutter priority mode is used whenever there is motion.
- This is a common misconception that We try to dispel whenever possible, since semi-auto modes are among the most useful tools at a photographer's disposal.
- Semi-automatic shooting modes are widely used by professionals in the field of nature photography.
- You can still shoot fully in manual mode even when you aren't in a 100% manual mode.
- If you have to fiddle with the exposure settings every time the lighting changes, you can miss some great shots.
- The lens's aperture is under your command while using the aperture priority mode.
- If the exposure of your shot is off, the camera can change the shutter speed automatically.
- Shooting in aperture priority mode is a great way to adapt to sudden shifts in light, making it ideal for capturing wildlife in their natural habitat.
- Unless you have auto ISO selected, you will also be able to adjust this setting.
- An increased ISO setting makes the camera's sensor more sensitive to light.
- By increasing the ISO, the camera can use a faster shutter speed while still maintaining an adequate exposure.
- So, in conclusion, We would advise you to refrain from using the shutter priority mode.
- It combines the advantages of full manual control with those of aperture priority and shutter priority.
- Simply set your camera to manual mode, which is usually labelled "M" on your camera's mode dial.
- Make sure your ISO is set to auto after that.
- To do this, simply navigate to the ISO setting in your camera's menu.
- The ability to eliminate motion blur while still retaining a soft bokeh makes this configuration a popular choice among wildlife photographers.
- The preference for aperture priority over this is purely habitual.
- You may adjust the aperture, shutter speed, and ISO independently.
- Since there is nothing in this setting that the camera can adjust, exposure correction is unavailable.
- To get the most out of portrait mode, try to shoot outdoors when there is enough of light.
- The combination of the sports mode and the continuous shooting mode, in which pictures are taken one after another, can produce a large number of photographs that are perfect for capturing movement.
- Don't expect truly macro results when photographing in macro mode; that requires a macro lens.
- When photographing in macro mode, it's best to utilise a small aperture and lots of light.
- There is less space for error when working with a shallow depth of field.
- When shooting in landscape mode, the aperture is typically kept narrow (a high f/number) so that the entire frame, from the foreground to the background, is in sharp focus.
- With a wide-angle lens and adequate lighting, landscape mode may produce stunning results.
- When shooting night portrait shots, the camera will automatically adjust the brightness of the foreground to maintain a good contrast with the dark background.
- While the camera chooses the shutter speed and aperture in P-Program mode, the photographer has full control over the camera's exposure controls.
FAQs About Photographers
Some photographers prefer dark and dramatic photographs, while others prefer light and airy ones. Photographers are also present and are notoriously picky about how their subjects look and pose for the camera.
Finally, some photographers have a more editorial, unstructured approach, capturing moments as they unfold with little direction. Find a photographer whose style you like, both in terms of the images they take and how they edit them, as well as how they direct a shoot.
Photography, art, and design are all intricately intertwined with one another. The great master painters and artists throughout history have passed on many of the ideas and principles we apply daily in photography.
Likewise, these have been passed down the generations. The guiding principles that underpin good design provide an excellent illustration of this.
Space These components, along with the fundamentals of art and design, form a cohesive whole. Repetition, contrast, balance, unity, and focus are some principles that fall under this category. A photograph should be aesthetically beautiful and well-balanced if the composition is decent. These aspects should be used.
This is because they almost usually centre around a single concept or idea, and unnecessary clutter is kept to a minimum. As a result, they are straightforward, honest, and utterly genuine. Today, we'll look at the various design components, such as line, shape, form, texture, and colour, that may transform a straightforward subject into an arresting photograph.
The guidelines for composing. Compressing a picture that turns out well requires more than just concentrating your lens on the subject of the shot. These are some of the most popular approaches to photographic composition that photographers use when they wish to create an aesthetically attractive picture. First, make use of the law of thirds. The "rule of thirds" is a method for splitting frames to get the most effective composition.